This tutorial covers my first steps of connecting an IoT device to QuestDB to explore the features and functionality. After using InfluxDB as a main data store for sensor data in the past, I'll be looking at the workflow and ease of use from this perspective and showing how simple it is for me to make the switch over to QuestDB.
This tutorial uses the UDP receiver, which is deprecated since QuestDB version 6.5.2. We recommend the TCP receiver instead.
The Database Part
The first thing I had to do was to get QuestDB up and running. Luckily, this is
very straightforward. There are a few options, the
Docker image for those who want to run without
installing any dependencies, a Homebrew install
with brew install questdb, grabbing the binaries directly, and
building from source. Since I work here, and I wanted to test out the latest and
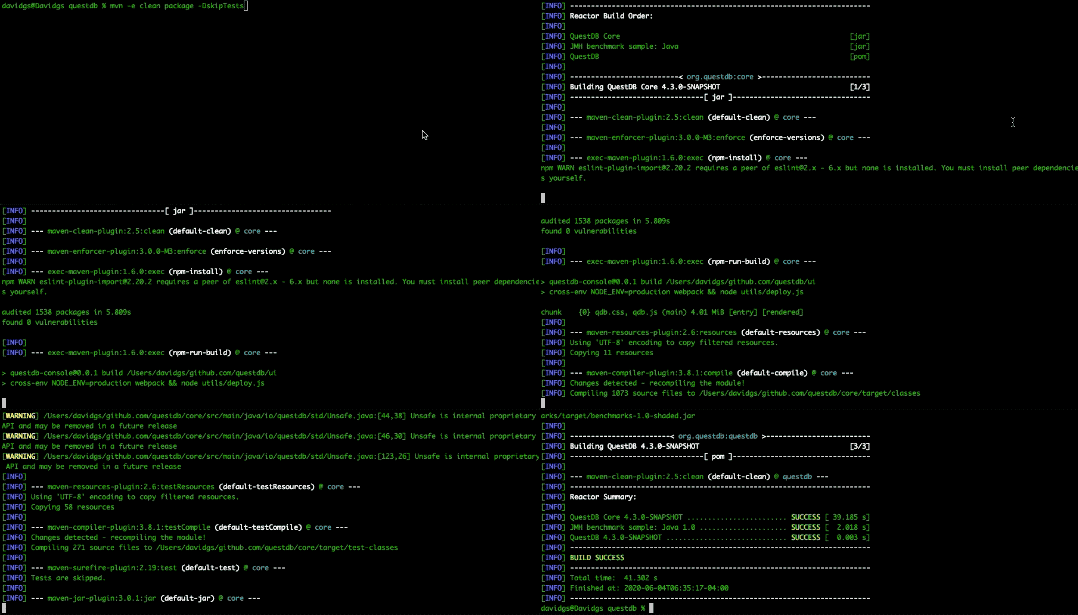
greatest Web Console, I decided to build using maven:
mvn clean package -DskipTests

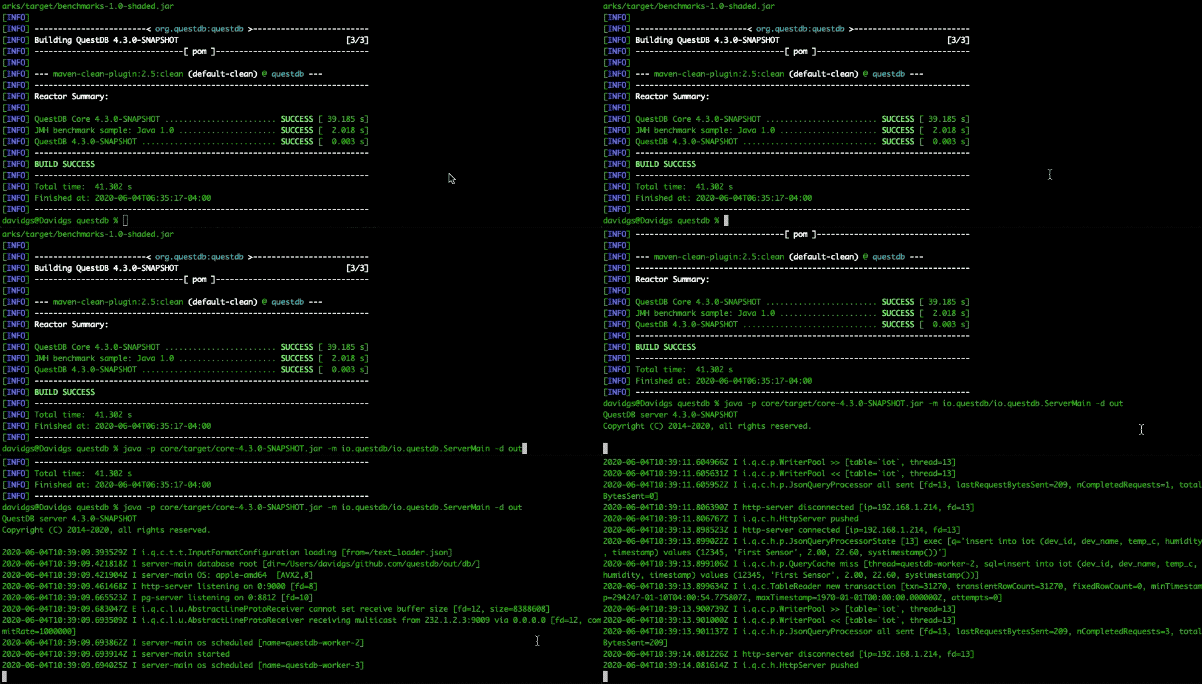
It builds really quickly due to the lack of external dependencies, so that is great! Then all that's left to do is to start the server:
mkdir qdb
java -p core/target/questdb-5.0.5-SNAPSHOT.jar -m io.questdb/io.questdb.ServerMain -d qdb

That is literally all there is to getting QuestDB built and running. But that's just the first part. Now it's time to do something actually useful with it. First, I'll need to create a table in QuestDB to store my IoT Data (A bit more on this later, so store a pointer to this).
create table iot (
  dev_id symbol index,
  dev_name symbol index,
  temperature double,
  humidity double,
  timestamp timestamp
) timestamp(timestamp) partition by MONTH;
Remember, we're using standard ANSI SQL here, so there's no new language or syntax to learn. This is a straightforward table that I'm building because I'm going to be using an ESP8266 with an (honestly not very accurate) DHT11 temperature and humidity sensor on it.
The Sensor Part
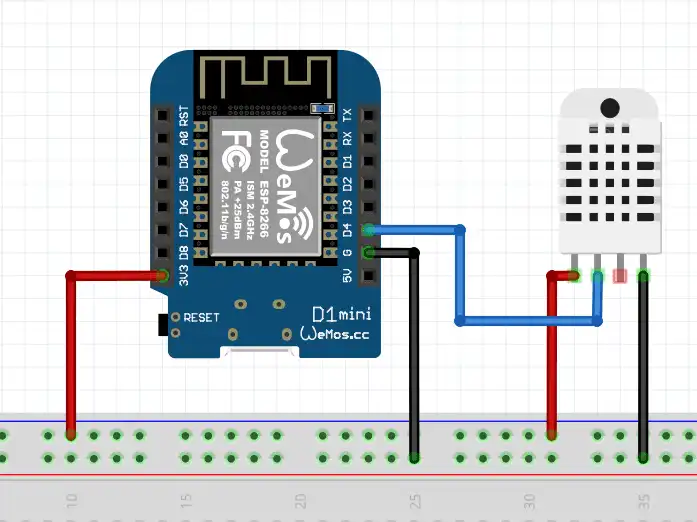
For this, I'm going to use an ESP8266-based WEMOS D1 Mini only because I happen to have a giant pile of them lying around. I buy them in bulk because they are a dollar or 2 each, easy to use, and largely disposable if I blow one up (which I do with alarming regularity.). The circuit is very simple to put together:

I used an actual WEMOS Shield with the DHT11 on it, so I didn't have to breadboard it, but this schematic gives you an idea of how simple the wiring is. It's literally 3 wires.
The Code Part
Here is where the magic happens. How I actually send the sensor data to the database. There is a simple example program included with the Adafruit DHT Unified Sensor Library that I recommend starting with to make this a bit easier. It already has all the parts to read from the sensor, so you don't have to write those from scratch. Remember, good developers copy, but great developers paste!
Since I'm using the 8266, and I'll need internet connectivity, I'll need all the WiFi bits:
#include <WiFiServerSecure.h>
#include <WiFiClientSecure.h>
#include <WiFiClientSecureBearSSL.h>
#include <ESP8266WiFi.h>
#include <ESP8266WiFiMulti.h>
#include <WiFiUdp.h>
#include <ESP8266WiFiType.h>
#include <CertStoreBearSSL.h>
#include <ESP8266WiFiAP.h>
#include <WiFiClient.h>
#include <BearSSLHelpers.h>
#include <WiFiServer.h>
#include <ESP8266WiFiScan.h>
#include <WiFiServerSecureBearSSL.h>
#include <ESP8266WiFiGeneric.h>
#include <ESP8266WiFiSTA.h>
#include <WiFiClientSecureAxTLS.h>
#include <WiFiServerSecureAxTLS.h>
Really all you have to do is go to the 'Sketch' Menu, Choose 'Include Library' and select the 'ESP8266WiFi' library, and you get all this stuff imported for you.
Here's some boilerplate code you can always use to get your ESP8266 on your WiFi:
#include <Adafruit_Sensor.h>
#include <DHT.h>
#include <DHT_U.h>
#define DHTPIN D4

// Digital pin connected to the DHT sensor
#define DHTTYPE DHT11 // DHT 11
#define QUEST_SERVER "10.10.10.10" // use your server's IP address!
#define QUEST_PORT 9009
#define SENSOR_ID 4343 // I made this up
#define SENSOR_NAME "DHT11-WEMOS"

const char* ssid = "your-ssid";
const char* password = "your-password";
DHT_Unified dht(DHTPIN, DHTTYPE);
uint32_t delayMS;
WiFiUDP Udp;

void setup(){
  Serial.begin(115200);
  delay(10);
  // We start by connecting to a WiFi network
  Serial.print("Connecting to ");
  Serial.println(ssid);
  WiFi.begin(ssid, password);
  while (WiFi.status() != WL_CONNECTED) {
    delay(500);
    Serial.print(".");
  }
  Serial.println("");
  Serial.println("WiFi connected");
  Serial.println("IP address: ");
  Serial.println(WiFi.localIP());
  dht.begin();
  Udp.begin(QUEST_PORT);
  Serial.println(F("DHTxx Unified Sensor Example"));
  // Print temperature sensor details.
  sensor_t sensor;
  dht.temperature().getSensor(&sensor);
  Serial.println(F("------------------------------------"));
  Serial.println(F("Temperature Sensor"));
  Serial.print (F("Sensor Type: "));
  Serial.println(sensor.name);
  Serial.print (F("Driver Ver: "));
  Serial.println(sensor.version);
  Serial.print (F("Unique ID: "));
  Serial.println(sensor.sensor_id);
  Serial.print (F("Max Value: "));
  Serial.print(sensor.max_value);
  Serial.println(F("°C"));
  Serial.print (F("Min Value: "));
  Serial.print(sensor.min_value);
  Serial.println(F("°C"));
  Serial.print (F("Resolution: "));
}
That gets the basics set up. Running that should get you a WiFi connection and a fully configured DHT11 sensor. We're almost ready to start sending data to the database.
You might have noticed the UDP stuff I snuck in there. That's because we're going to make this super easy and use UDP to send our data. And there's a really good reason for that: InfluxDB line protocol. You see, QuestDB has a built-in InfluxDB line Protocol listener, but (for now) it's only listening on a UDP port. So we're going to use that.
Now, to send some data:
void loop() {
  // Delay between measurements.
  delay(delayMS);
  char *buffer;
  buffer = (char *)malloc(256);
  // Get temperature event and print its value.
  double temp = -212;
  double hum = -1;
  sensors_event_t event;
  dht.temperature().getEvent(&event);
  if (isnan(event.temperature)) {
    Serial.println(F("Error reading temperature!"));
  } else {
    Serial.print(F("Temperature: "));
    Serial.print(event.temperature);
    temp = event.temperature;
    Serial.println(F("°C"));
  }
  // Get humidity event and print its value.
  dht.humidity().getEvent(&event);
  if (isnan(event.relative_humidity)) {
    Serial.println(F("Error reading humidity!"));
  } else {
    Serial.print(F("Humidity: "));
    Serial.print(event.relative_humidity);
    hum = event.relative_humidity;
    Serial.println(F("%"));
  }
  if(temp != -212 && hum != -1){
    char tTemp[10];
    char hTemp[10];
    dtostrf(temp, 4, 2, tTemp);
    dtostrf(hum, 4, 2, hTemp);
    sprintf(buffer, "iot,dev_id=%d,dev_name=%s temp_c=%s,humidity=%s", SENSOR_ID, SENSOR_NAME, tTemp, hTemp);
    Serial.println(buffer);
    Udp.beginPacket(QUEST_SERVER, QUEST_PORT);
    Udp.write(buffer);
    Udp.endPacket();
  }
  free(buffer);
}
Yeah, a lot is going on in there, so let's break it down. First, I'm creating a
buffer to hold the data I'm going to send, and then I'll do a read of the
sensor. I set the temp and hum variables to values that I know the sensor
will never return so that I can check that I got valid readings later to avoid
sending gibberish to the database.
I have to do some shenanigans with the temperature and humidity values in there
because one of the shortcomings of Arduinos is that they don't have sprintf
support for doubles. I know. So I turn them into strings and move on. Once they
arrive at the database, they are interpreted as doubles and life is good. Not
worth fighting about. I can then construct a buffer with straight line protocol
and ship it off to QuestDB over UDP.
Don't forget to free the memory!
That Pointer
Remember I told you to set a pointer earlier about creating the database? Well, here's where I come back to that. You don't actually have to create the database ahead of time unless you want to do things like set indexes, etc. If all you want to do is have straight values in there, then guess what? Schema-on-write is a thing here. You can start writing data to the database, and it will happily store them for you. Pretty cool stuff.
Querying the Data
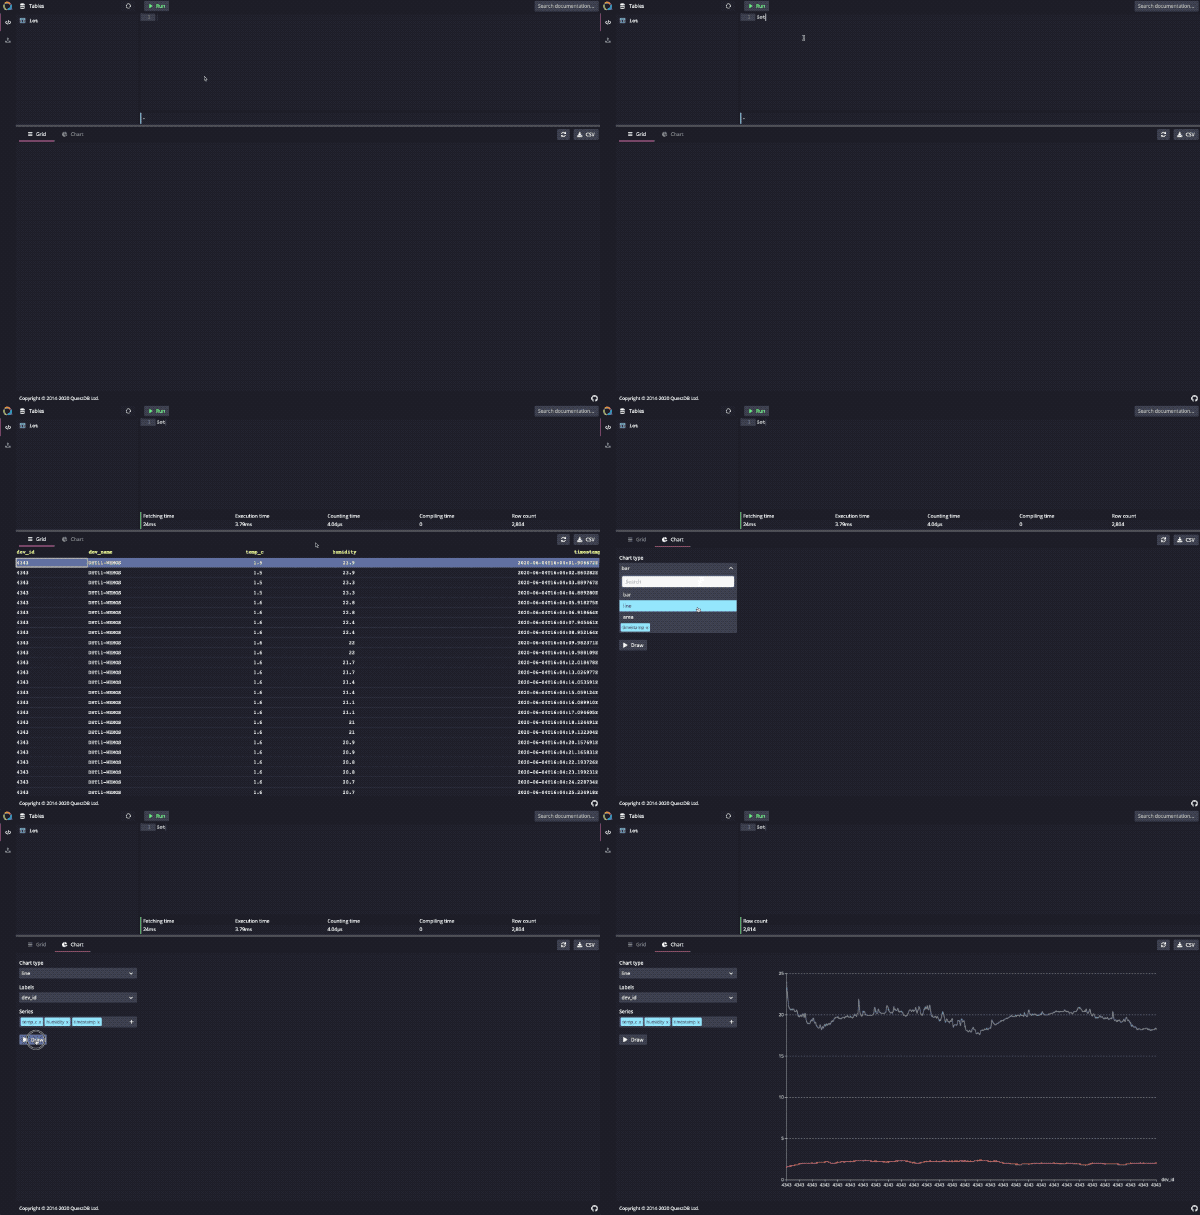
Using the QuestDB Console, you can then query the data to make sure you're getting what you expect:

That's exactly what I expected!
What's Next
Now it's time to start building some dashboards on top of this. I'm currently working on connecting this all up with Node-Red, or making use of the support for Grafana, which will be huge, so stay tuned for that. If you like what you see here, pleases go give us a star on GitHub, and follow the project if you'd like to get updates!